|
To add an element to the diagram, you proceed like this:
- Select an existing element or an empty block by clicking on it (or by traversing the selection via cursor keys to it).
- Then you will have four possibilities:
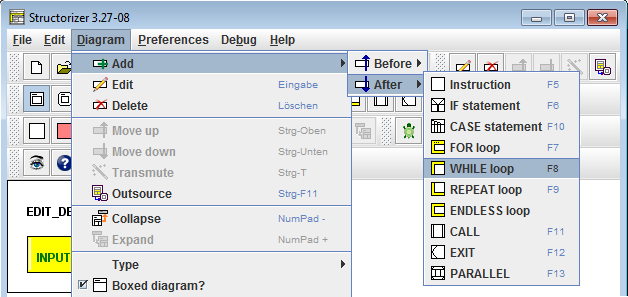
- Do a right click on the selected element and use the contextual menu "Add › Before" or "Add › After" to insert a new element before or after the selected one. Simply choose the needed kind of element from the submenu.
- Use the menu "Diagram › Add › Before" or "Diagram › Add › After" to insert a new element before or after the selected one. Simply choose the needed kind of element from the submenu.
- Use one of the speed buttons in the tool bar:
 . .
If you hold the <Shift> key pressed when clicking on the chosen button then the element will be inserted before the selected item, otherwise after it.
- Use the respective function key shown in the according menu item of "Diagram › Add › Before" or "Diagram › Add › After" (e.g. <F6> to append an IF statement to the selected element, <Shift><F6> to insert an IF statement before the selected element etc.). On page Key bindings you'll find the complete list as well.

Note: Double-clicking an empty block in the diagram always inserts a new element of the type "Instruction".
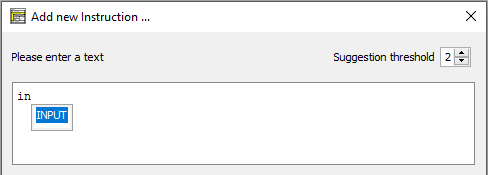
Before the element gets actually inserted, the element editor will pop up and expects you to type in the desired content (see sections Elements and Edit Element for details). For certain kinds of elements (loops, alternatives) the text field will be prefilled with the respective default text configured in the Structure Preferences, the caret (or cursor position) will already by placed at the first question mark in the default text (from version 3.32-15 on).
Since version 3.32-11, a little Content Assist may help you with context-related word suggestions.
 |

